Musical Monstrosities
by Dent (dentedfun@protonmail.ch)
I recently decided I wanted to combine my two favorite things, hacking and music.
Some refer to this lovely art form as "circuit bending," the process of modifying electronic toys to make interesting and unique sounds they were not intended to make. Of course, that's the complicated way of saying, "Breaking open a toy and screwing around with some wires." In this article I will explain step-by-step how to make your own musical monstrosity to have fun with or show your friends.
Required Tools
- Soldering Iron
- Solder
- Wire
- Wire Stripper(s)
- Wire Cutter(s)
- Screwdriver (of varying sizes)
- Switch(s)
- Button(s)
- Resistor(s)
- Variable Resistor(s)
- Spendable Cash
- Alligator Clip(s)
- Drill (with varying drill bits)
Getting a Toy
First of all, you have to pick a toy to hack.
The first toy I ever successfully hacked was picked up from a Canadian dollar store for $2.50 (because apparently that's how dollar stores work).
It was an electronic organ, which I later dubbed the Xorgan because of its weird glitchiness. I suggest not spending over $10 on your first toy because there is a chance you will break the thing. I learned this one the hard way (completely destroying a $20 talking turtle). Toys that make music (keyboards, xylophones, etc.) are in my opinion the most fun to play with.
Familiarization
Next you have to familiarize yourself with the toy.
I suggest doing this alone in a room if you don't feel like explaining why anyone over the age of five would be playing with Tickle Me Elmo.
Don't be afraid to like your toy. I spent 30 minutes playing Yankee Doodle on the Xorgan before I even took the thing apart. By the end of this step, you should know what every button and switch does on your toy.
Dissecting Your Toy
Now it's finally time to expose the guts of your toy.
Most toys will have screws on the back which makes it very easy to open up with a screwdriver. If your toy, for whatever reason, doesn't have screws on the back, you may need to use other tools (X-Acto knives, pliers, etc.) to take the back off.
After the case is divided and the inner workings are visible, go ahead and locate the circuit board. It's usually green and decorated with visible solder joints or, as some know them, little silver blobs. If the circuit board is screwed into place, unscrew it so you can move it a bit.
Brainwashing Your Toy
Break out your finest pair of alligator clips.
While pressing buttons on the front of your toy that activate sounds/music, put the ends of your alligator clips on various solder joints. Try to stay away from the battery pack, but don't be afraid to experiment! Eventually you should hear an audible change in the toy's sound. It might change the pitch, the tone, or it might totally glitch out. Once you find this change, you may want to attach a potentiometer or other variable resistor to your alligator clips in order to see how your sound changes with different levels of resistance.
If it sounds better with the variable resistor, then make note that you would rather use that instead of a simple switch. It does help to mark connections you like on a printed-out picture of your circuit, but it isn't necessary as long as you know what you touched.
Wiring It Up
Now that you've found some good connections, it's time to make them permanent settings in your toy.
Take out your solder and soldering iron as well as some wire. Cut a length of wire that you find suitable and strip the ends so that you can solder it all together. Where one end of your alligator clip was, attach your wire. Try to use thin solder so as not to bridge any solder joints you didn't intend to.
Solder the other end to a switch (or variable resistor if you prefer). Repeat this process with another wire on the other solder joint, attaching it to the same switch.
Test it out. Switch in between your custom sound and the normal sound.
If it isn't working, de-solder your connections and try again.
Congratulations!
The hard part is now over and you've already got something really cool to show off. All we have to do now is make your toy look a little more pretty.
Stitching Up Your Toy
While you may be tempted to walk around with your toy guts making cool sounds, it's a lot neater to put the case back together with your newly installed switches on the outside of the case.
Take out your drill with a drill bit about the size of the shaft of your switch/variable resistor. Drill a hole in one of the ends of your case, and poke the switch/variable resistor through.
Tighten it with a washer and a nut (which usually comes with the component). Screw the case back together with the same screws you took out earlier, and play with your new sounds.
Labeling Your Toy
All that's needed are a few optional final touches.
It helps to write the direction that your switch switches in with permanent marker. I also like writing funny phrases and titles on the outside of my case.
Conclusion
In conclusion, making musical monstrosities is a fun and cool activity.
Sometimes you might end up with your next favorite instrument.
The best part is the fact that what you've created exists nowhere else. No other person will ever have what you've made unless you give it to them.
Show off your toy on the Internet, and teach others how to make their own.
Have a great time with your new musical instrument!

The front of my Xorgon, beautifully labeled.
(I removed the black keys because they didn't make any noise.)
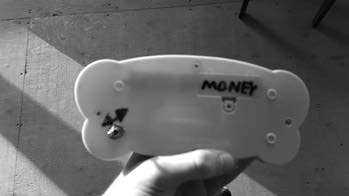
The back of my Xorgon, containing a switch with the direction labeled.
I also labeled the battery pack "money" because money is power (badum tssss).
Links
circuitbenders.co.uk - A cool site about circuit bending.
www.anti-theory.com/soundart/circuitbend - A great place to start circuit bending.
Circuit-Bending: Build Your Own Alien Instruments - A very expensive, but very informative, book about the art of circuit bending.